FrontPup is your CloudFront companion for WordPress.
FrontPup is a plugin for WordPress to optimize your website for a CloudFront distribution to host your website. CloudFront can be used as an alternative to services such as CloudFlare.
Why use CloudFront with a WordPress website?
When using CloudFront you are putting the entry point of your website very close to your web visitors.
CloudFront is a CDN service provided by Amazon Web Services. CloudFront has over 700 standard Points of Presence (POPs) globally, plus a significant number of “embedded POPs” within ISP networks, totaling hundreds more, all working with AWS’s robust backbone to offer low-latency content delivery across 100+ cities and 50+ countries.
CloudFront provides SSL termination at the POP which helps eliminate the latency between your web visitor and your web site by handling the SSL closer to the visitor’s Internet connection. IF you are looking for performance and your WordPress web site is hosted on AWS, you should be utilizing CloudFront.
CloudFront can also provide server side web traffic logging and can cache pages based on caching policies you configure. These caching policies can be further enhanced within WordPress, which is where FrontPup comes in.
FrontPup Features
- Enable Cache-Control headers for public pages
- Set the web browser the Cache-Control max-age
- Can optionally set the CloudFront Cache-Control s-maxage
Typical WordPress Site that can use CloudFront with FrontPup
The typical setup for CloudFront for a WordPress website on AWS would be one of the following:
- EC2 instance that hosts a WordPress site
- Application Load Balancer that routes to 1 or more EC2 Instances that host a WordPress site
- Application Load Balancer that routes to a ECS hosted WordPress site (containers)
- AWS Lightsail WordPress website (which is essentially an EC2 instance managed by the Lightsail web interface)
It is also possible to setup a WordPress website hosted elsewhere (not on AWS) and use AWS CloudFront.
Setting up CloudFront for WordPress and FrontPup
CloudFront uses “origin” request and “caching” policies for paths on your website. These paths are called “Behaviors” and each behavior can include wildcards to match desired paths. For a typical WordPress site website the ideal path behaviors are setup as (the order is important):
- /wp-content/*
- /wp-includes/*
- /wp-*
- DEFAULT (*)
For each path behavior above, we will use the built-in origin request policy “AllViewerAndCloudFrontHeaders-2022-06” which works well. Very important, the order of the path behaviors is critical, we want the first 2 paths at the top so they take precedence over the /wp-* path.
For the “caching” policies, you will need to create a policy for caching WordPress for the 1, 2 and 4th path behaviors. The 3rd path behavior will use the “CachingDisabled”. caching policy.
For our custom policy, lets name it “WordPressCaching”. This policy will cache pages and assets such as css, js and images for 1 day if the server does not send caching headers. It will also cache pages for signed in users separately by caching using the wordpress_logged_in_{hash} cookie as a cache key. With the assistance of FrontPup, when someone is signed in the WordPress site will send no-cache headers so only the non signed-in users will experience pages cached by CloudFront.
Creating a WordPress cache policy
In AWS Console, go CloudFront then navigate to “Policies”. Click “Create cache policy”.
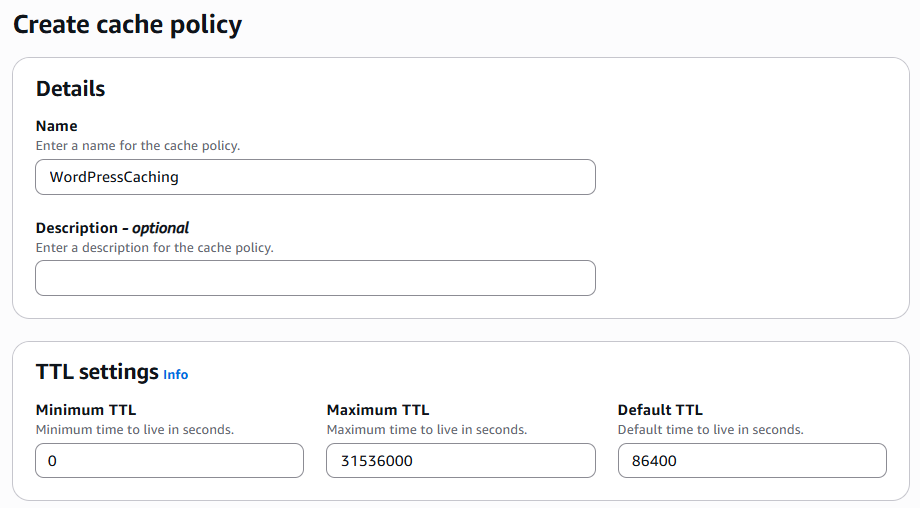
In the cache policy editor, use the following settings:
- Details
- Name: WordPressCaching
- TTL settings
- Minimum TTL: 0
- Maximum TTL: 31536000
- Default TTL: 86400
- Cache key settings
- Headers: None
- Query strings: All
- Cookies: Include the following cookies
- wordpress_logged_in_*
- Compression support
- Gzip (check)
- Brotli (check)
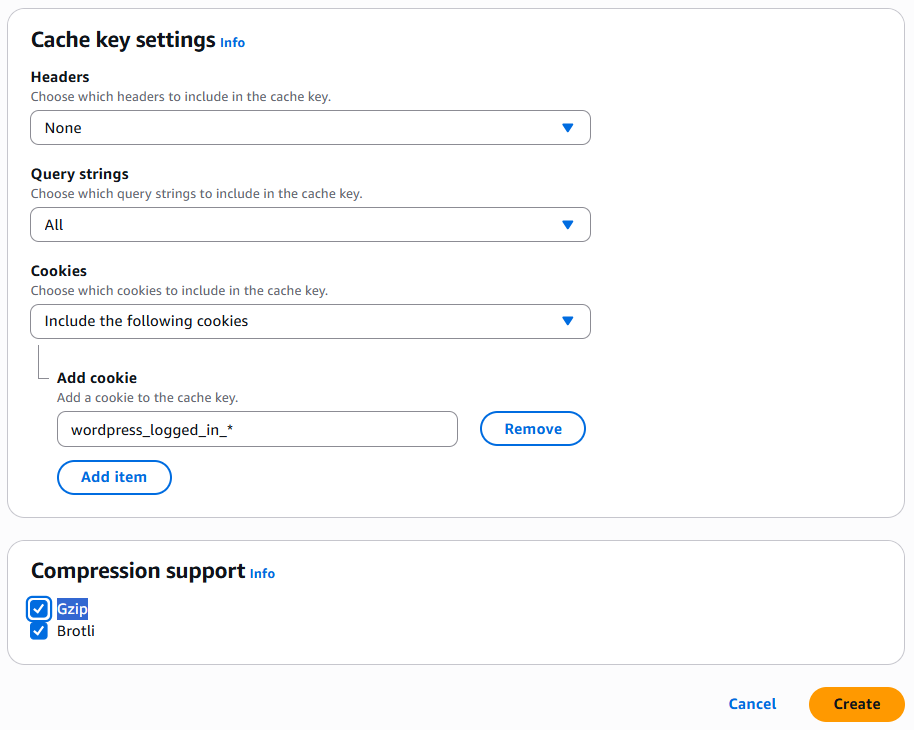
Click “Create” to create the policy for use when configuring CloudFront distriributions.
Create Behaviors for your CloudFront Distribution
Now create a new behavior for the path “/wp-content/*”. When creating the behavior make sure to
CloudFront uses origin and caching policies for paths to your website. These paths are called “Behaviors” and each behavior can include wildcards to match certain paths. Use the following settings as a guide:
- Path pattern: /wp-content/*
- Compress objects automatically: yes
- Viewer protocol policy: Redirect HTTP to HTTPS
- Allowed HTTP methods: GET, HEAD, OPTIONS, PUT, POST, PATCH, DELETE
- Restrict viewer access: No
- Cache key and origin requests: Cache policy and origin request policy (recommended)
- Cache policy: WordPressCaching
- Origin request policy: AllViewerAndCloudFrontHeaders-2022-06
- Response headers policy: [leave blank]
- Additional settings: n/a
Click ‘Create behavior”.
Repeat the same steps above for the path pattern: /wp-includes/*
Repeat the same steps above for the path pattern /wp-*, except for the Cache policy select “CachingDisabled”.
Last, edit the “Default (*)” behavior and set it up the same as the the first 2 behaviors.
How FrontPup works with CloudFront
The FrontPup WordPress plugin when configured will set Cache-Control headers for public pages found on your WordPress website. When requests come in for a user that is currently signed in, the Cache-Control headers will specify that no caching should be used, which CloudFront will recognize and not cache those pages. For asset files such as css, js, and images in your /wp-content and /wp-includes paths, CloudFront Cache behavior above will cache those files for 24 hours (Default TTL setting). When FrontPup sends Cache-Control cache settings, those settings are used by CloudFront as long as the values are between the Minimum TTL and Maximum TTL.
Download and Install FrontPup WordPress plugin
Click the link below to download the zip
Go to the admin panel of your WordPress website then click on ‘Plugins”. Click “Add plugin”, then select “install from zip”, then select the zip file that you just downloaded to install. Once uploaded, activate the plugin and then go to Settings > FrontPup to configure. If you are in doubt, use the default settings.